Living Room
 |
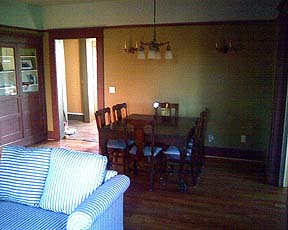
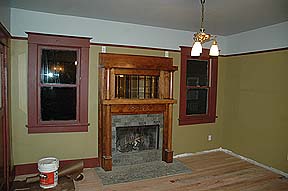
On July
17th, Kass began arranging her house with furniture in the
Living Room. Left a sofa with hide-a-bed we obtained
from Craigslist, and a wing back chair from a garage
sale. The sofa will be getting a slip cover.
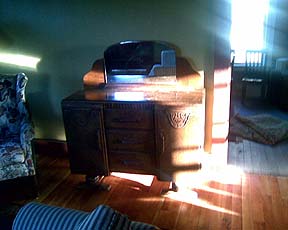
Lower left the table & chairs we also purchased off of
Craigslist, and below a buffet also garned from
Craigslist. With Kass' camera in for repairs, photos
were obtained with Rick's cell phone. On July 20th Kass
finished the shoe molding, and this room is finally
completed! |
 |
 |
 |
 |
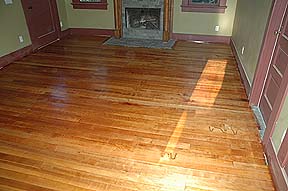
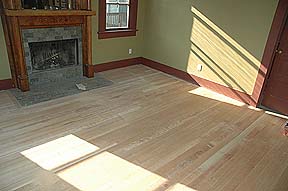
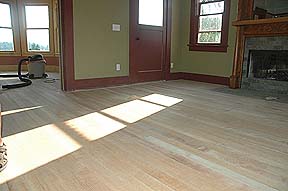
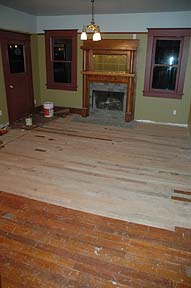
| On
the weekend of July 5th we cleaned and prepped the floor
in the Living Room and applied the first coat of Waterlox
to it. Above left, before, and above right after the
first coat, below left, the second coat is on, and below
right the third coat has been applied. After the
fourth coat was down, Kass' camera was damaged and we were
unabel to get a picture of just the floor with the final
coat. |
|
 |
 |
 |
 |
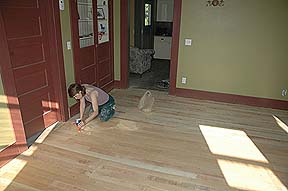
| After
many
more sandings the Living Room is ready for some touch
ups. Above left Kass is filling a section damaged by
some beetles with wood glue & sawdust. |
|
 |
 |
 |
 |
 |
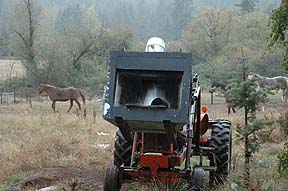
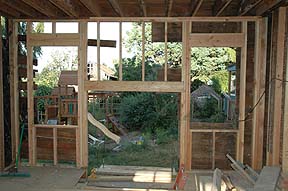
On the wekend of June 21st we tried sanding the floors in the Living Room and Parlor. We started out with a vibrating plate sander and after a day of sanding only got as far as you can see above. We took it back and tried our hand at a drum sander. Left Kass is turning a less than pleased look at Jayden who grabbed the camera (Hey, for once it wasn't me!) as she tries the drum sander out. After a few hours with it we're a little farther along, but far from done. Time will tell if we get finished with it today. |
 |
 |
| Father's
Day
weekend we had it all cleaned up after the party, and are
planning on sanding the floors next weekend! Here
you can see all the trim work completed throughout the
room. Bottom Right the foreman comes through to
check the cleaning. <grin> |
|
 |
 |
 |
 |
| On
June 6th, Kass' daughter Alex and her boyfriend Ben
Liechty came out to help (Upper left) along with Kass' son
Rick (Upper right). Lower left the fireplace wall is
nearly compelted, lower right the wall next to the Kitchen
also just needs a few molding pieces we were waiting for
the paint to dry on and short of refinishing the floor
this room will be done! |
|
 |
 |
| Lower
left
the new (to us anyway) wood flooring! Lower right
the new door into the Living Room is completed! |
|
 |
 |
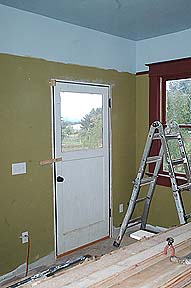 Left is the new door for the Living Room! After we put in the strike plate, all it needed was a fresh coat of paint and it's good to go! |
 Above is the flooring we
started in the Living Room. We saved the
unfinished pieces for the center of the room as they
will be covered up with a rub for the party we are
having this weekend, but will refinish them all
eventually.
|
 |
 |
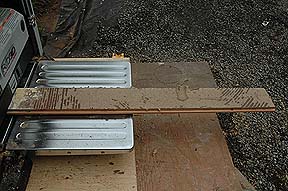
| Rick borrowed a planer from his dad Cliff Young. As you can see it cleaned up the boards with linoleum and glue stuck to them very very well! | |
 |
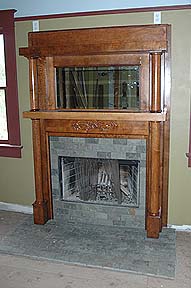
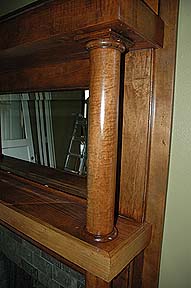
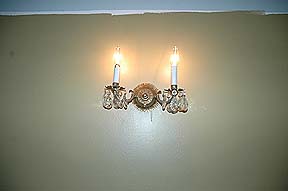
 On May 27, 2008, Dave from Rocky's Furniture in Estacada, OR brought back our restored fireplace mantle. We absolutely could not believe this was the 'Cookie Monster Blue' piece we had given to him to restore! It looks absolutely fabulous, and it's sturdy as well! He had to remove 16 layers of paint and replace two pieces of wood that had deteriorated, but the rest is all original pieces. What a wonderful addition to our Living Room!  |
 |
|
 |
 |
||
 |
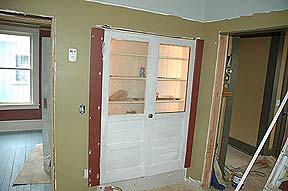 |
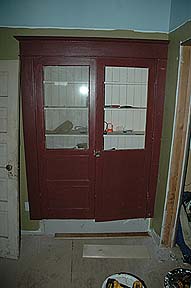
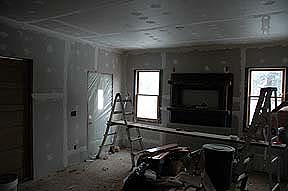
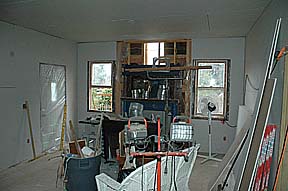
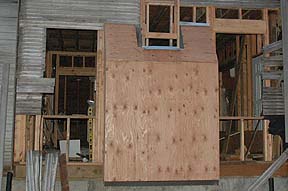
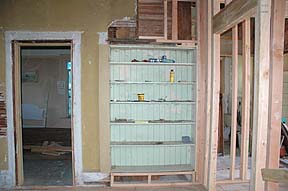
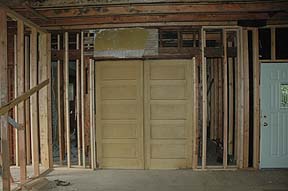
| On Memorial Day Weekend 2008, we completed many tasks in the Living Room. Upper left we built new window sills and headers, and put in the picture rail on the fireplace wall. The mantle should be completed in the next few days. Upper right the re-installed built-in cabinet doors, although one window cracked and we've removed the glass. Kass' son Rick installed some interior lighting for the cabinet (lower left). Lower right the painted doors with trim & header. When we re-built the wall between the Kitchen & Living Room, we made it a bit too close to the Living Room and had to trim down the header & side trim | |
 |
 |
 |
| On the weekend of April 12,
2008, Kass sealed and grouted the fireplace tiles in the
Living Room. |
 |
| On April 2nd, Kass laid
down the tile for the Hearth! |
 |
 |
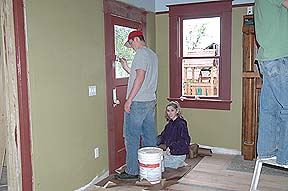
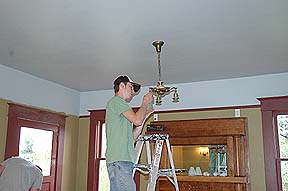
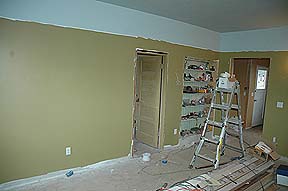
| On
March 6th, Kass painted the entire Living Room! Her
dad Fred came and helped her install the light fixtures
that evening. This was one big job! |
|
 |
 |
 |
 |
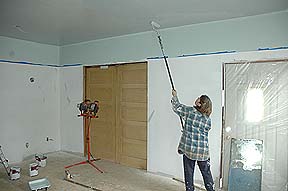
| Here's
Kass putting on the second coat of the Living Room's
ceiling paint. |
Here
we've just begun the wall's first coat! |
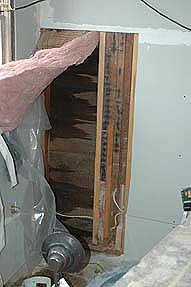 |
| We had
a slight mishap in the Southeast corner of the Living
Room, water was getting into the wall, Kass had to remove
some sheetrock to try to find the problem, turned out to
be a problem on the outside behind the gutter at the end
of the Roof, she put in some flashing and caulked the heck
out of it, now we wait for the next big rain and hope the
wall stays dry! |
 |
This is the living room with one coat of mud. ................................ |
 |
And here is the same corner with the second coat of mud...one more to go, then texture and paint! |
. |
| We started a fire in our fireplace for the first time December 20th, 2007. Jayden loved sitting in front of it soaking up the warmth! |
 |
On the
5th & 6th of December Kass sheetrocked and finished
the framing in of the pre-fab fireplace. We plan to
take the mantle in to be professionally restored as we
dont want to risk damaging it. |
 |
 |
Big Rick framed in the fireplace and put in the firestop blocking above before the inspection was done, but we hadn't taken a picture of it then. ..........................
|
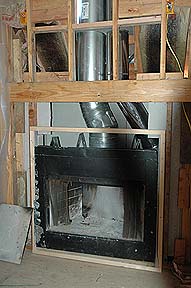
On the first two days of November, Kass & her dad installed the fireplace insert and the chimney pipe up to the roof line. Once this passes inspection we can finish the sheet rock in the Living Room! ............................................. |
 |
 |
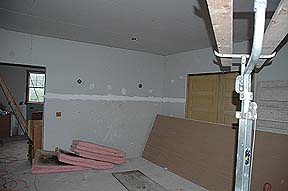 |
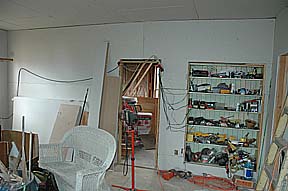
| After
finishing
the sheetrock in here, we cleaned and stacked all the
items in a corner so we could clean out the Den Room to
get it insulated and sheetrocked. Kass did get some
taping & mudding done in here too, but will need the
heater being used in the Parlor to get the mud to dry. |
|
 |
 |
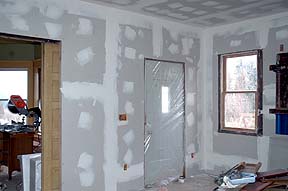
| On
the weekend of October 7th, 2007, we finished putting up
the sheet rock except for a small section next to the
Kitchen where the central vacuum line goes, as we need a
part to finish it first. |
|
 |
 |
 |
| Here you can see the over
half covered ceiling! |
 |
On Father's Day weekend of 2007 Kassandra finished restoring the windows in the Living Room. Here's a shot of one with the weights in on the newly glazed windows. Please note the camera was crooked, not the house! <G> ........................................ |
 |
| Over the following week,
Kass and Rick finished up the siding (mostly Kass!) and on
the next weekend of the 21st, we installed windows in the
Living Room, for the first time since we've owned the
house! |
 |
 |
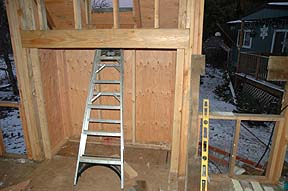
| On
the weekend of January 14th, 2007, Kass & Rick
finished the framing on the fireplace box to hold the
prefab fireplace. The chimney chase goes up 16 feet
and stops just below the roof. When we are ready, we
will have to cut a hole in the Roof for the chimney to
come up through it. Meanwhile this fills a huge hole in
this wall! As shown below, we need to finish the
siding around the windows and put a faux brick finish on
the box and it should be complete. |
|
 |
 |
| Kass bought this mantel on E-bay. A little paint stripper, and it is good to go over our prefab fireplace in the living room. |
 |
 |
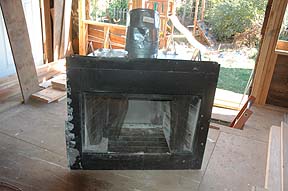
Here is the new fireplace we found at The Rebuilding Center. It's a Heatilator model TD36B. We found an installation manual on the web from the company itself! ..................................... |
 |
 |
 |
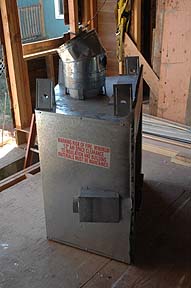
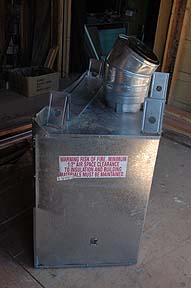
We found this fireplace at The Rebuilding Center for $50! We'll look it over and if it works, save ourselves a bundle on this little project! ...................................
|
 |
 |
 |
| While
looking around for fireplace ideas, Kass found this one at
All-Ways Warm in Portland, OR. We're looking into
the option and will keep it in mind. Thanks to "The
Blabber". |
On Saturday, July 22nd, 2006, we journeyed out to Brian & Deb McDonald's Rockaway beach house, where we helped them remove the original wood flooring they needed to take out, and we needed for our Living Room and Parlor! It took us a total of about Eight and a half hours, but we took it out and loaded into Rick's mom's pickup (see below). |
 |
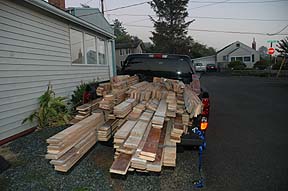 |
We also managed to kill about nine sawzall blades, and most of the muscles in all four of our bodies! Above Rick & Deb begin tackling the last half of the living room of the Beach House. Our cordless Sawzall batteries couldn't keep up fast enough so we used their Rigid Sawzall. We estimate we recovered about 600 square feet of flooring. We believe this will replace all the Living Room and Parlor flooring. |
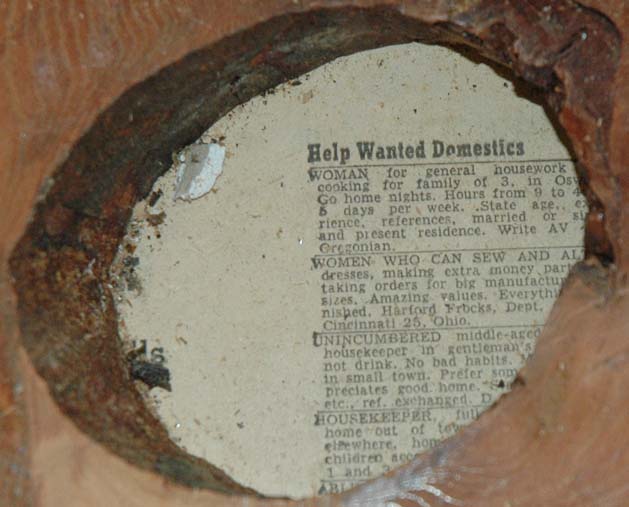 |
| In a subfloor board in one
of their bedrooms, we found this ad from a 1950 newspaper
peeking at us! |
 |
| On July 9th Big Rick
finished framing in the window openings for both the new
windows in the Living Room. Once we finish repairing
some sag in the floor joists above we'll see about
re-doing the siding. |
 |
| We were able to repair the
built in china cabinet in the Living Room, putting new
bracing underneath and replacing the right-hand "wall" of
it. We also completed the framing above it, and once
we've restored the original doors and re-paint the insides
we can complete it! |
 |
 |
 |
Here we
have the pocket doors in the walls repaired above, and then closed to divide off the Living Room & Parlor. Once we had the walls repaired (06-20-2005) we couldn't resist putting the doors back in to see how they looked and worked. They need to be oiled rather badly!!! |
 |
 To the left is a door we
bought from a recycling center on 3/19/05 to fill the
gap till we get the house moved and a more appropriate
door Above are the ceiling joists we finished on
03/02/05.
|
 |
 Above: Doorway in
Living Room re-opened once again!
Left: Kass cutting off an
old water pipe to make room for the new ceiling joists.
|
 |
 |
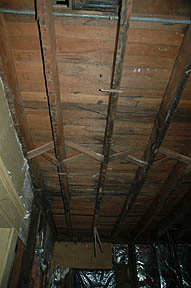
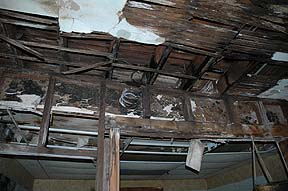
| This is
the Living Room celing, you can see the bracing that the
original builder installed to stabelize the ceiling joists
until they could be floored above. We found tiny copper
gas lines in the ceiling that used to fuel the gas lights. |
With
the subfloor mostly down we have a place to set our
ladders to finish the ceiling joists. The floor
above is nearly level now, and we almost have enough done
to replace the bearing wall separating the Kitchen here. |
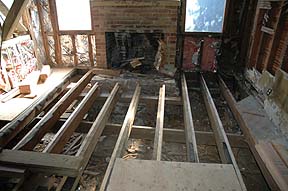 Here you can see the new floor joists going in. We had replaced or sistered in all but two floor joists in the Living Room at this time, and part of the subfloor. |
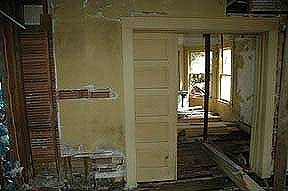 A shot when we finally
opened one of the pocket doors. We did find some
damage on the bottom of the door that may be repaired
with some wood epoxy.
|
 |
 |
 |
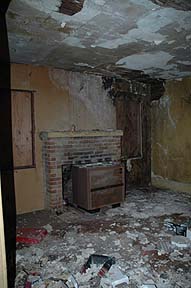
| This
was the Living Room fireplace. A previous owner had
installed a wood burning stove. The windows on either side
are gone. The fireplace ( not original) will be torn down
to move the house. |
This is
the built in china cabinet in the Living Room. I think it
can be saved. Most of the mess on the floor was the fallen
ceiling plaster. This was how the room looked when
we first surveyed the house. |
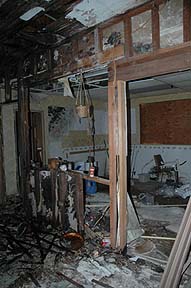
This
was the wall between the Kitchen and Living Room, the
previous owners had stripped it and started to repair it.
The leak in the roof above caused damage to the floor and
the wall as well. |
 |
 |
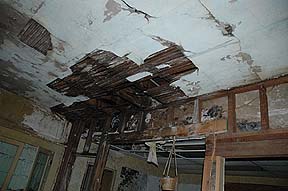
| Closer
look at the ceiling damage in the Living Room-Kitchen
area. |
This
wall is being replaced along with the ceiling joists. |
Back to House Index Page
Warped by Ratt Sass Productions - Last Updated 07/20/08